As a blog reader, I find it helpful and convenient to have the ability to check out what is in the post before I start reading. As a blogger, I want to make sure my readers have that convenience when reading posts on my website. As an added benefit, it should help increase my dwell time and overall user experience on my website.
Fortunately, setting it up is a fairly straightforward process.
In this post, I will walk you through how I set up the Easy Table of Contents WordPress Plugin. I'll show you why I picked it and how to set it up as well . We'll also look at some key configurations that you might want to change.
Let's get started!
In the WordPress dashboard, navigate to Plugins and then click on Add New. In the search bar type in "Table of Contents".
Here were my search results. I highlight a couple key points that I look for when choosing any plugin and some points on this Table of Content plugin specifically.
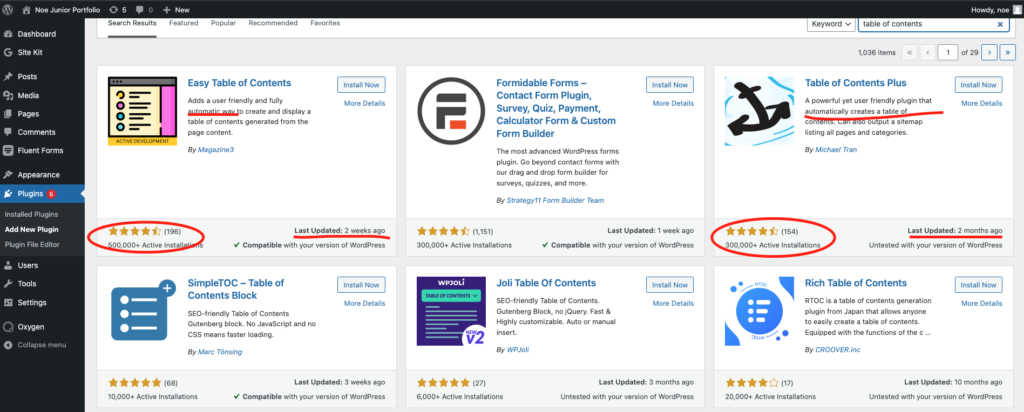
So a quick search shows 2 main options. For the table of contents specifically, my only requirements are that I want a solution that creates them automatically based on my heading structure, and the other requirement is that I want it to be added via a shortcode so I can place it in my template where I'll have more control over the placement.
For every plugin, not only the table of contents plugin, I always make sure it checks a few criteria:
1. Relatively large user base - In this case I'm looking for 300k Active Installations or more
2. It's been updated relatively recently. In this case, within the past few months.
3. Good ratings 4.5 or more with over 100 reviews.
So 2 plugins match this criteria, Easy Table of Contents by Magazine3 and Table of Contents Plus by Michael Tran.
Which would you pick? Based on the options on this list, I'd go with the one that has more active installs because it means that more people are using it and it also happens to be the one that has been updated most recently.
So I'm going with Easy Table of Contents by Magazine3
From here, go ahead and click install, then click activate. When you reload your page you'll be at the configuration options. Otherwise, you can navigate to the configuration page by going to Settings > Table of Contents.
By default, this plugin will add the table of contents automatically to posts and pages.
In my case, I want to add it via a shortcode but we'll take a look at what it gives us right out of the box.
So on the front of my website, I'll just navigate to a blog post.
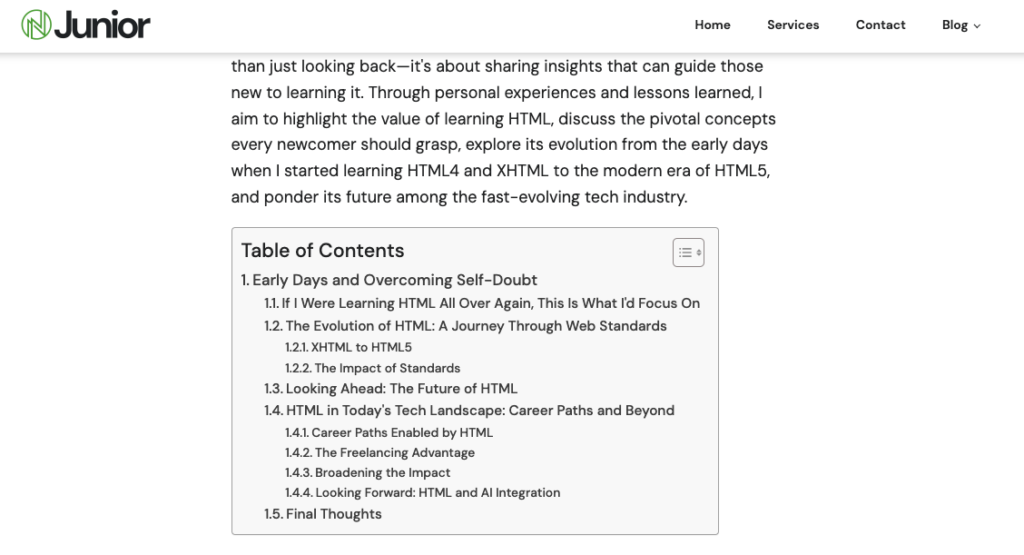
And that looks really good right out of the box!
If that's all you wanted, you're done. Congratulations, pat yourself on the back, go tell your boss you did an amazing thing and ask for a raise 🤩
At this point, you might not want table of contents to show on pages, which is the other default option for auto placement. In that case, in the settings page, uncheck the box for support and under auto insert.
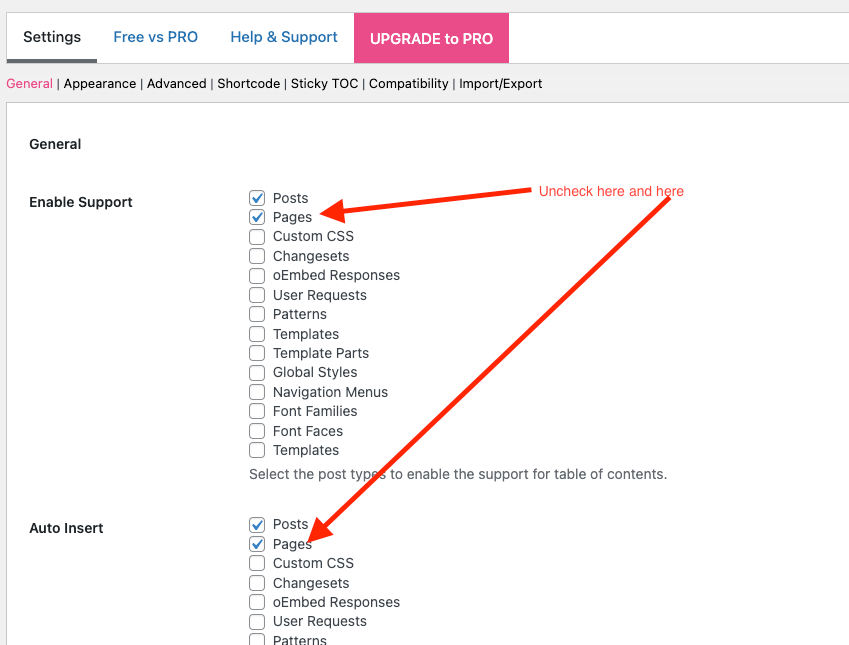
Don't forget to save!
There are a TON of options which can be overwhelming but let's take a look at the most common ones in the each settings area.
If you want to change the position where the table of contents is displayed, you can just use the position option. Most people would prefer it at the very top but it gives you pretty much every option you could want so feel free to test them all to find out which one you like best.
Using the "Show When" setting you can make sure the plugin only shows when the post has a set number of headings. For example, if you don't want it to show for anything under 5 headings, set 5 in the dropdown field. This will essentially only enable the ToC for long blog posts.
In the "Header Label" setting, you can change the title from "Table of Contents" to something else, like "Jump to Section" or "Quick Read" whatever you want.
The "Show as Hierarchy" checkbox is checked by default and gives you a structured list. So H3s will be displayed indented under the H2 but if you prefer it to be just a straight simple list, uncheck this box and you'll get something like this instead.
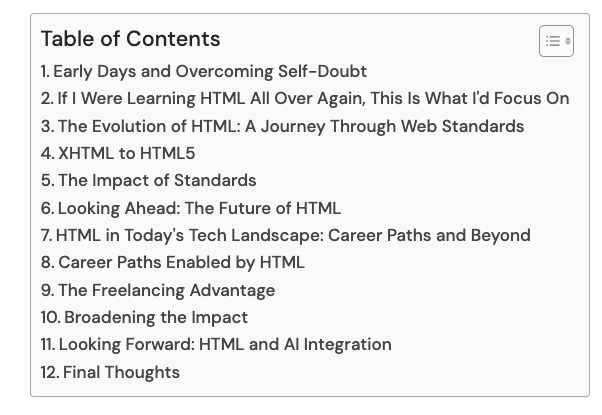
The Easy Table of Contents plugin does a really good job of giving us customization options. Pretty much anything that you would like to customize, you have an option for. There's not too much detail I can get into because customization is specific to you and your website brand.
Explore the options and test them out. One tip that I can give in this section is to use these options for customization first before you make custom CSS declarations to customize the look.
Not only is it easier, it's better for your site performance. If you add your own custom css when you could have done the same thing in the settings, you're going to end up with redundant CSS in your overall source code and at certain levels, mirco seconds added to your load time can result in a drop in conversion rate.
Speaking of performance, we also have some settings that can help us in this department. In the advanced tab we have an "Inline CSS" setting. It's a simple checkbox. So does this really improve your website performance?
I tested it! Let's see.
Here's my site before I enabled "Inline CSS"
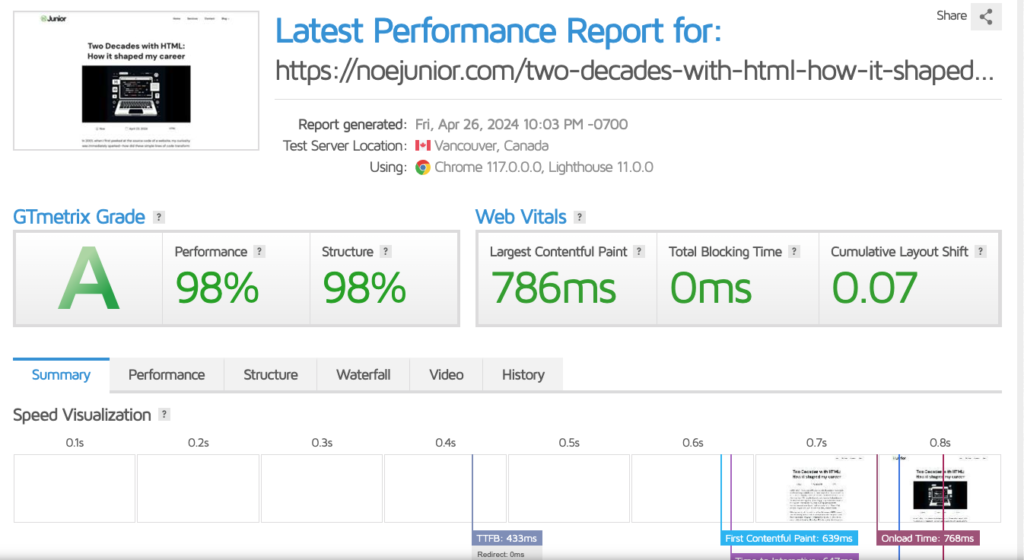
Here's after I enabled it
The software I used to test this is GT Metrix incase you want to try it on your site.
When you enable Sticky ToC, it gives you a tab in the placement that you select from the settings. I put mine on the top left. When you click the tab, it opens a totally different UI. Customizations for this feature are only available in the Pro version. Although if we base a decision to upgrade to pro for this feature alone, it's a safe bet that you'll be given everything you need to make it how you want it.
By default, the ToC displays where your template uses the_content() php inside of the single.php template, but you could customize this by disabling the auto insert feature then put it somewhere else inside of your single post template.
I used Oxygen Builder to develop my website, so my case is slightly different but if you're using Elementor, Divi or any other theme that has a template editor, the process is pretty much the same.
In the template editor, look for the template that is generating your single blog post layout. This might not be very easy to find but use your best guess to try and narrow it down through process of elimination. If you're unsure if you're in the right template, make a subtle change like add a random letter and then save it. Check the front end, if you see the random letter, you know you're in the right template.
There are also helper plugins that you can install to give you more information about your pages like what templates are being rendered.
Initially, this was the approach I wanted to take to implement on my website, but implementation did not go as expected. It looks good initially but once you scroll, the headings do not wrap and the module extends outside of the sidebar and overlays the blog post content.
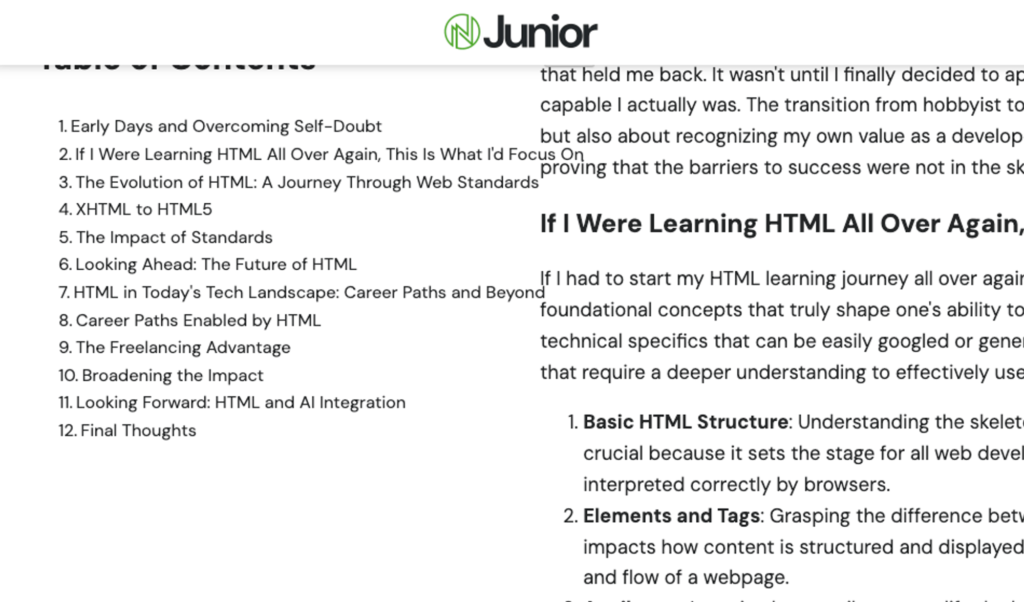
This might be a conflict with Oxygen builder but the short code approach is not going to be doable for me without further advanced customization but I'll be sure to test it with Elementor to know for sure.
In the meantime, I would recommend that you try adding your shortcode to wherever you want it in your template and see how it works out. If you don't like, default to the auto-display feature or subscribe to my newsletter and be sure to get notified when I update this post to include how to set up a table of contents manually.
This was actually maybe the 2nd table of contents I've ever installed on any websites. I don't work with many bloggers and I just started blogging myself but it gave me a good idea of what solutions are there in the ecosystem.
For what it does, I'd say this plugin is fantastic. It delivers an easy solution to add a table of contents to your website. I know the amount of options it has in configuration is overwhelming but I'm pretty confident that in most use cases, you won't even need to further configure anything else apart from where to display it. In the case that you do, you pretty much have everything you need and I explained some of the more common customizations above.
For more advanced layouts, this plugin is going to take more technical expertise to set up but that might just be the limitation of the free version and all can be sorted with the paid version.
Final thought, if you want to know more about things like SEO benefits and how it can help your users, check out this post, they cover it all and are far more knowledgeable on the subject. For me personally, I use it to make my site look better and to give my readers a way to skip straight to the information they came for. SEO is a nice bonus!
As I continue to work on implementation on my own website, I'll be sure to update this post with more information so be sure to subscribe to the newsletter so you never miss an update.